
Most marketers spend an insane amount of time, effort, and money in creating new landing pages, content offers, and running ads. However, many of them tend to overlook the fact that their website can also be a great source for lead generation.
What’s more, did you know that an average website sees 98% of anonymous visitors?
While a few fill out the lead form and leave their email addresses, what happens to the other anonymous visitors who come and go without getting converted?

Most B2B marketers will agree that there is nothing more frustrating than getting plenty of website traffic, only to see poor conversions.
Well, guess what, you are sitting on a goldmine of data that can help you identify those prospects, lure them back and (hopefully) convert them. What’s that, you ask? Your website.
Yes, apart from directly generating leads from your website, you can also use it to uncover those anonymous potential leads.
Here’s a breakdown of the guide –
A. How to Generate Leads from your Website?
- Install a Page Takeover Exit Intent Popup
- Use Time Delay Popups
- Display Offers Based on Where Users Come from
- Install Popups Where You Lose Users
- Display Popups Based on User Interests
- Use Popups on Pages with High Exit Rates and Bounce Rates
- Use Interactive Quizzes
- Reverse IP mapping
- Use HubSpot’s Prospecting Tool
- Use LinkedIn Website Demographics
- Track Visitors’ Geolocation
B. What Can You Do with the Data?
- Uncover New Accounts and Offer a Personalized Experience
- Re-engage with Ghosting Prospects
- Improve Lead Nurturing
How to Generate Leads from your Website?
Here are 11 advanced methods of uncovering data with your website, and generate leads.
1. Install a Page Takeover Exit Intent Popup
Did you know that 99% of people who visit a website for the first time don’t intend to make a purchase? Most visitors simply search for information about products, services, or prices and leave the website once they’ve found what they were looking for. But if you don’t engage them, you’ll lose out on some serious business opportunities. Here’s where an exit intent popup can help.
An exit intent popup can help you capture some of this traffic and convert them into leads. In fact, studies have found that 35% of lost visitors can be re-engaged using exit intent popups. But what exactly are these? They’re basically popups that would appear on a user’s screen whenever they attempt to exit or leave your site.
Regardless of whether a user has landed on your website to check out your services, products, or prices, the moment they drag their mouse towards the close button on their browser, you can make this popup appear on their screen.
We recommend you to display a page takeover popup that takes up most of their screen at this time. It could look something like this:

A page takeover exit intent popup can help you re-engage your website visitors and convert them into leads ~ Image via Sumo
So, how do you go about creating these exit intent popups? You can use a tool like Hello Bar. Just log in to this platform and create your exit intent popup in a few easy steps.
- Step 1 – Choose your Goal first. For example, you might want to use your exit intent popup to grow your email list, promote certain offers, or drive traffic to a certain web page.
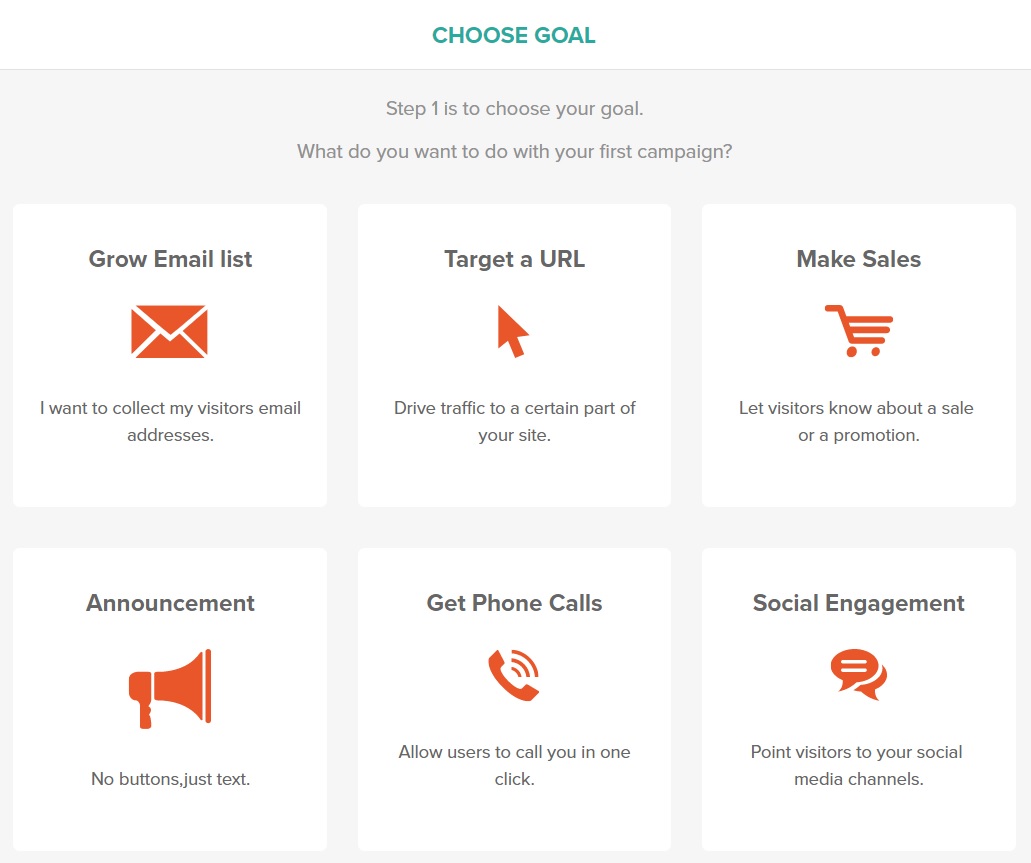
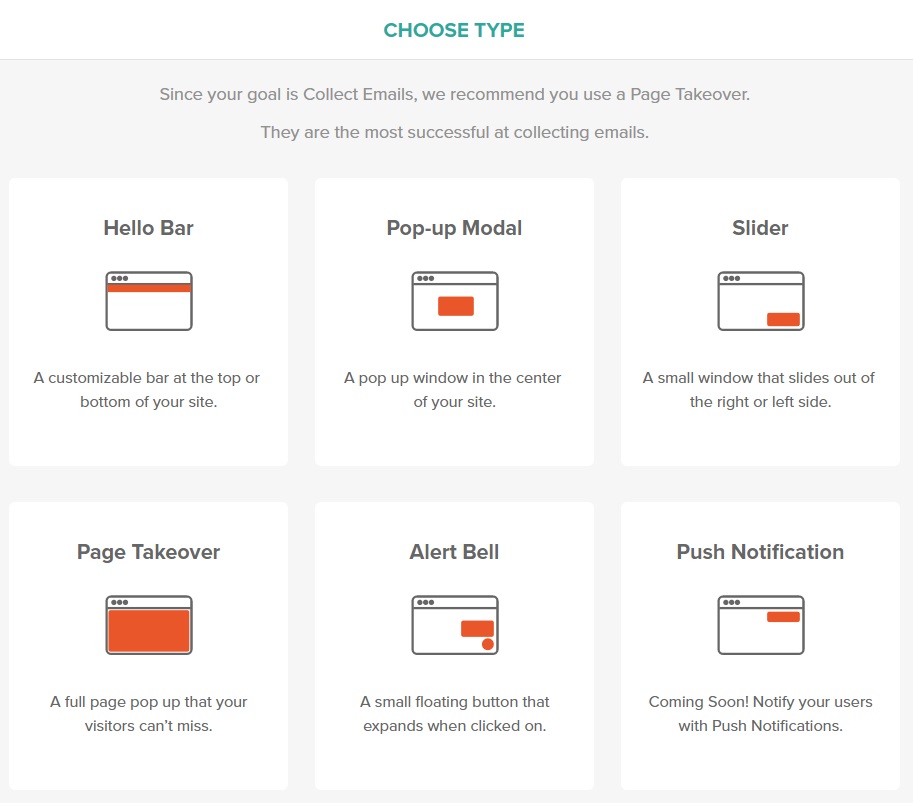
- Step 2 – Select the Type of popup you want. In this example, since my goal is to grow my email list, I’m going to select the Page Takeover popup.
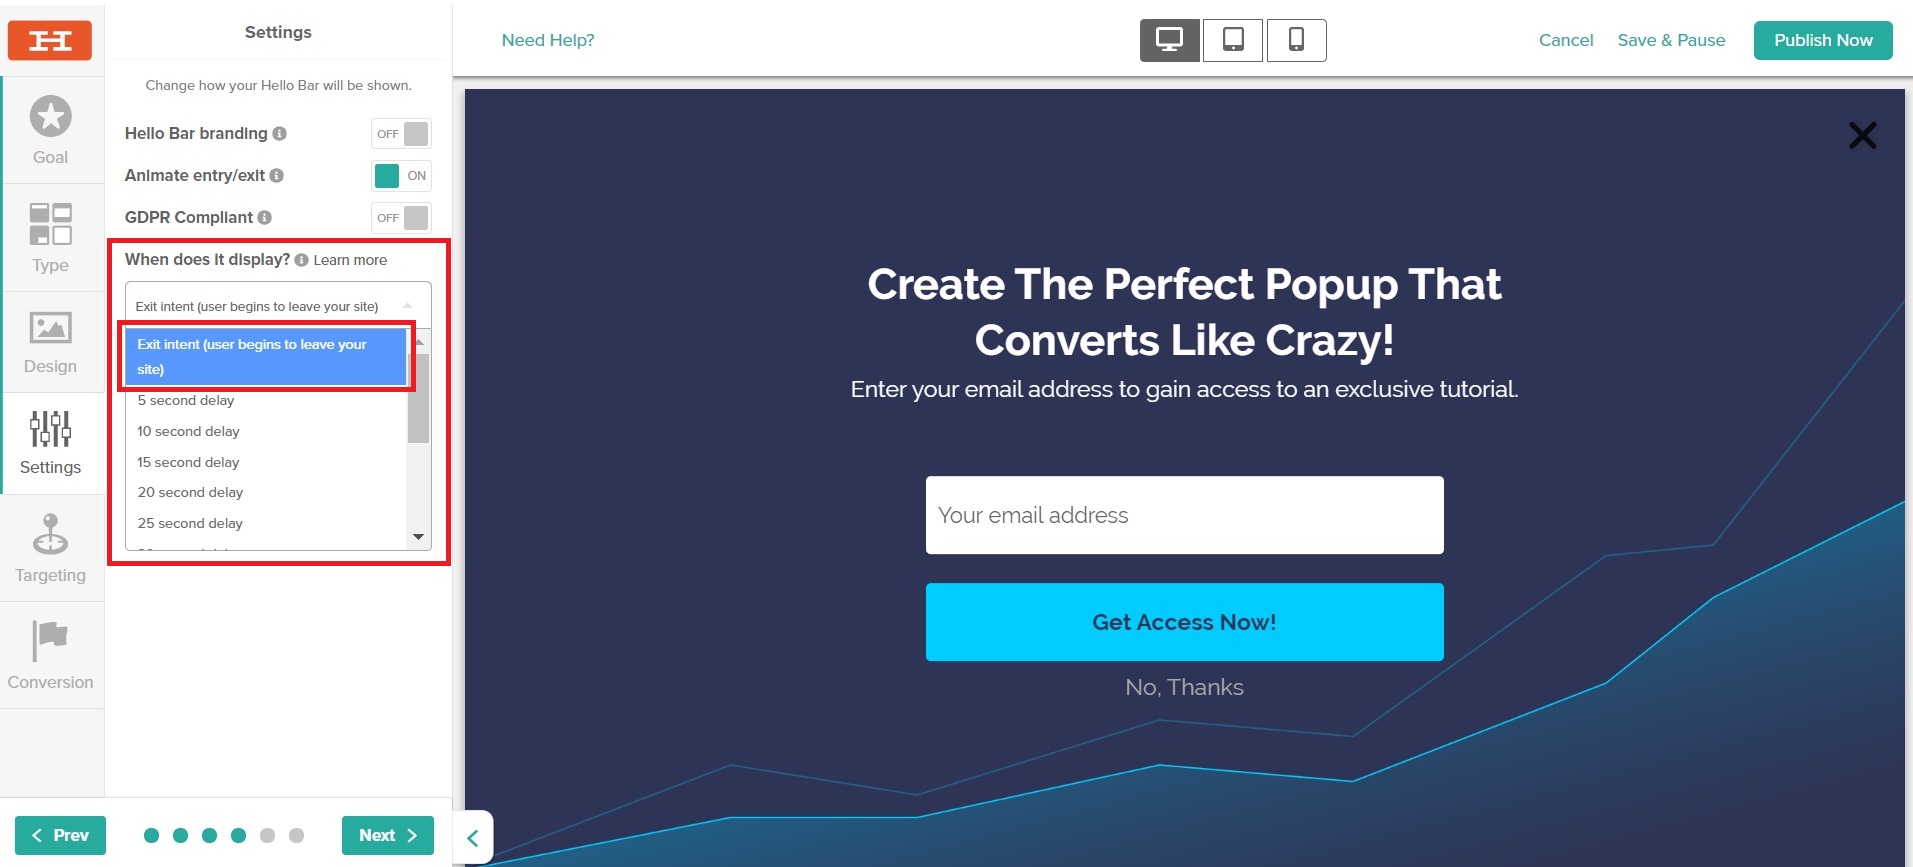
- Step 3 – Design your popup. You can choose from a large number of built-in templates and simply enter the text to be displayed in your exit intent popup as shown below.

Make sure that your headline is catchy enough to grab the attention of your website visitors and your offer is useful and relevant for them to be interested in it.
- Step 4 – Go to the Settings tab and change when you would like the popup to be displayed as shown below.
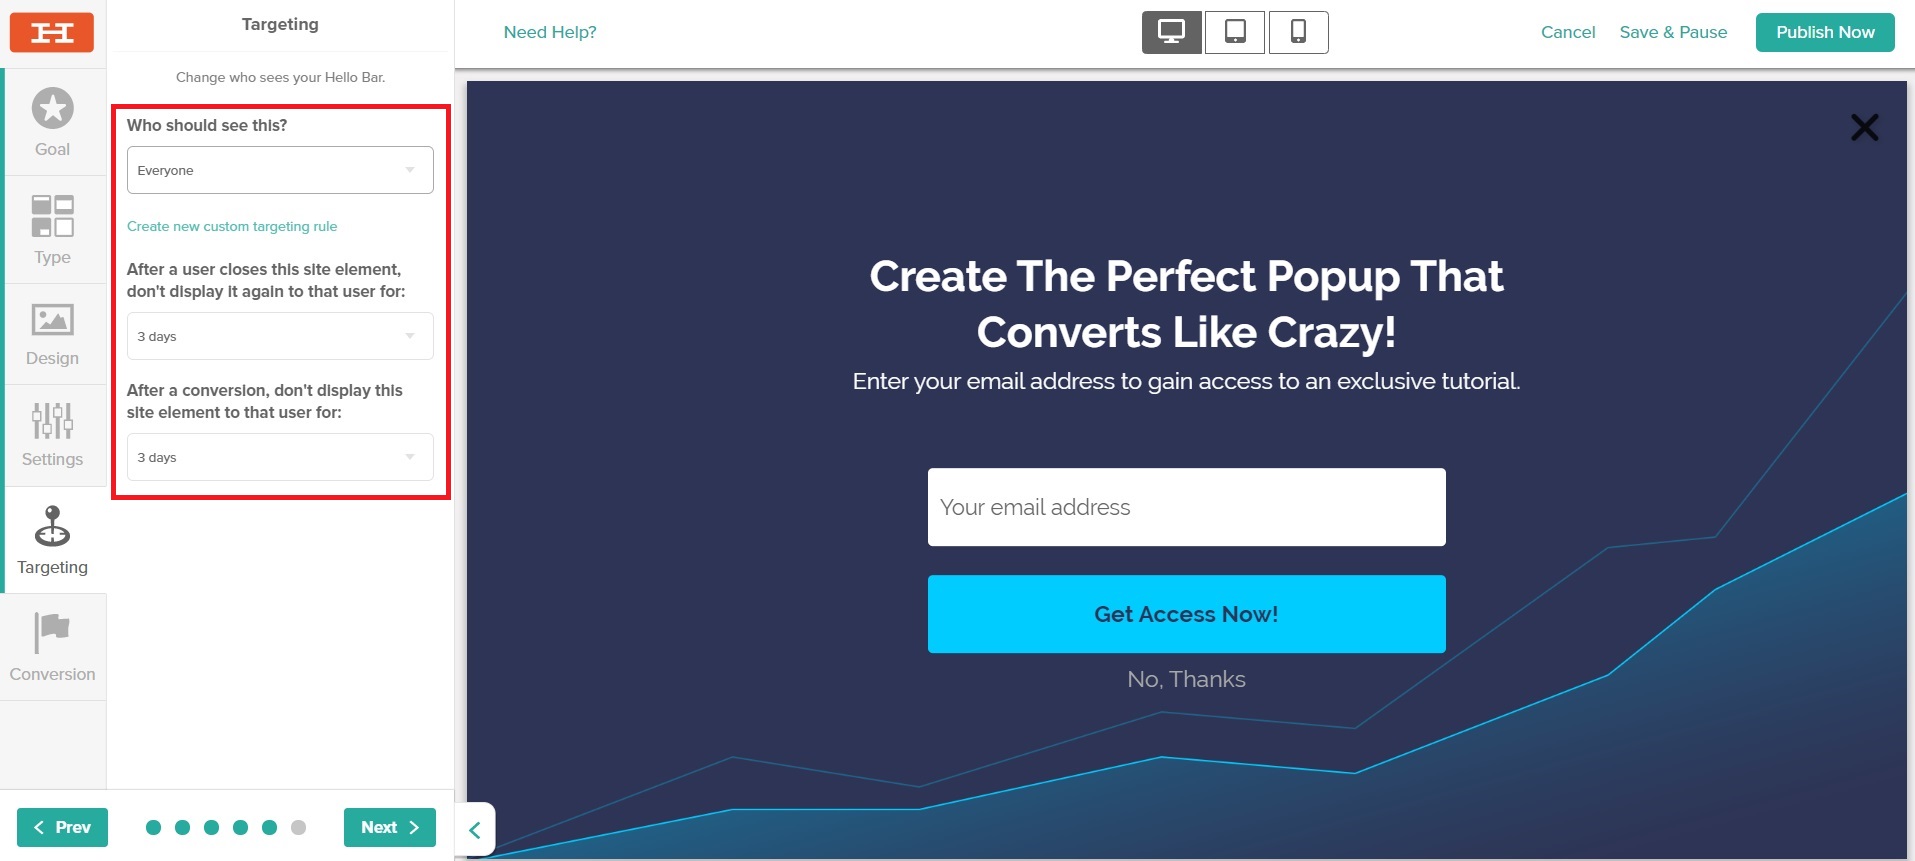
- Step 5 – In the Targeting tab, select whom you want to show your popup to – all visitors, website visitors, or mobile site visitors. In the same section, you can also define rules around how long to wait before displaying the popup again to a certain user.
- Step 6 – In the Conversion tab, decide upon the message to be displayed when a user submits their email address using your exit intent popup.
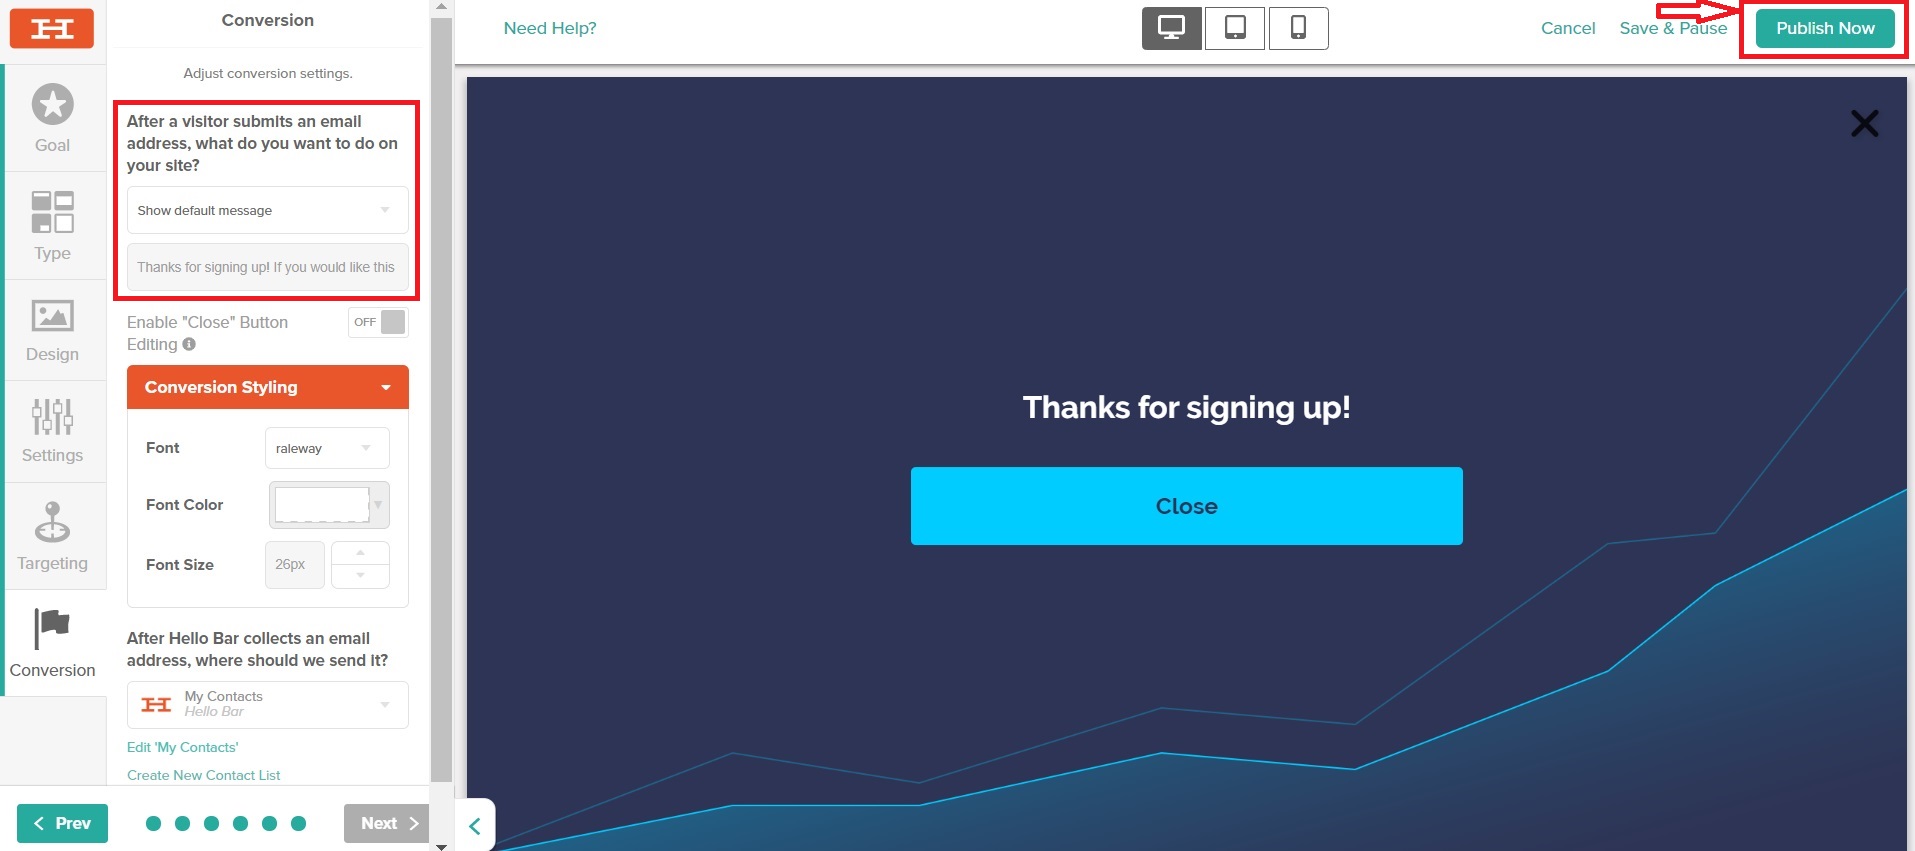
- Step 7 – Hit the Publish Now button on the top right-hand corner to make your exit intent popup go live on your website.
Go back to the Table of Contents
2. Use Time Delay Popups
If you don’t use your popups with caution, you might end up annoying your website visitors and losing them forever. Popups that appear immediately after a user lands on your website not only provide a bad user experience but can also adversely affect your search rankings.

Google released an update to their mobile search algorithm in January 2017 due to which mobile sites that displayed a popup on arrival were likely to rank poorly in search results.
To avoid this, do not display your popup immediately after a user lands on your web page. Instead, you should display your popup after they’ve spent a certain amount of time on your website. Here’s how:
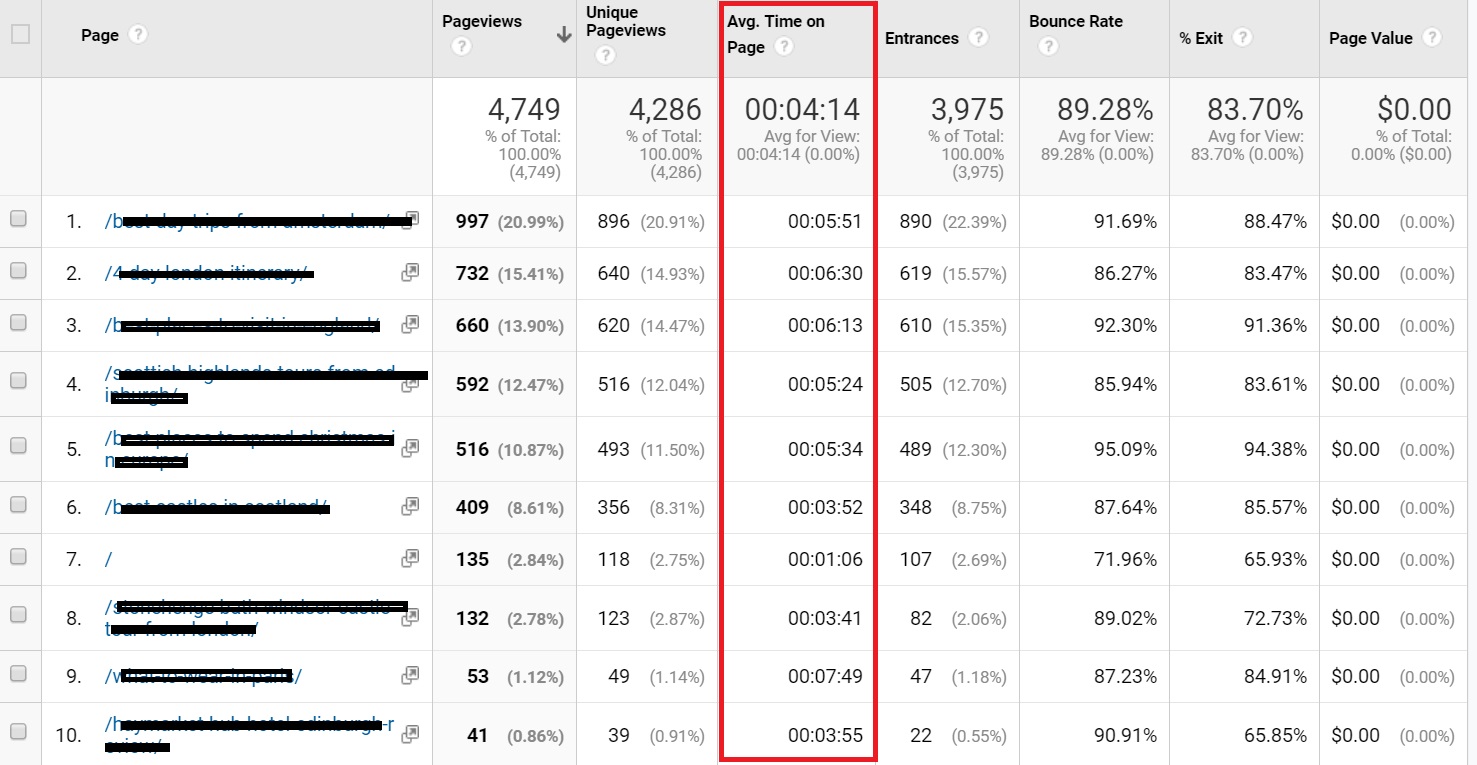
- Step 1 – Find out the average time users spend on your website – Go to Google Analytics > Behavior > Site Content > All Pages
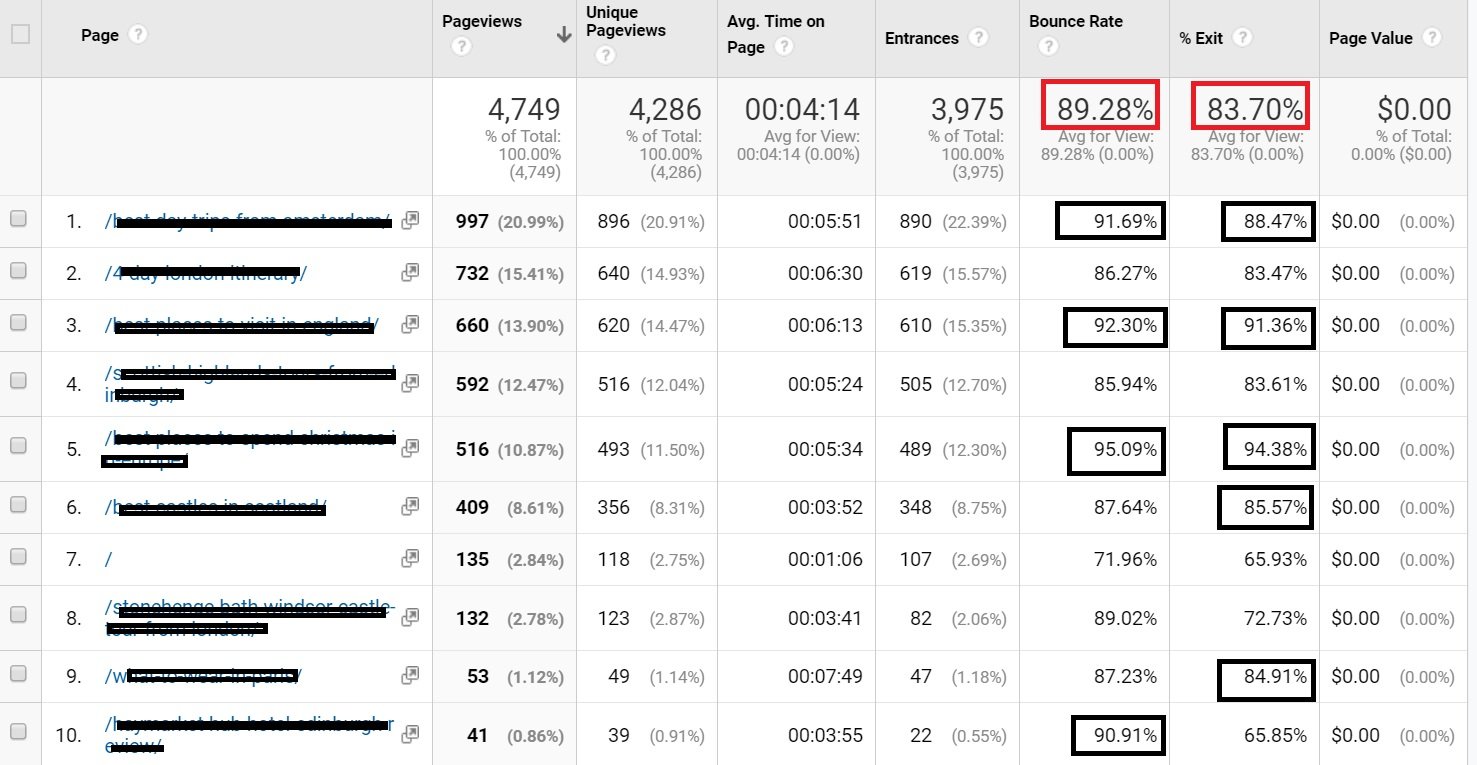
- Step 2 – Identify the pages on which users spend less time than the average time on page. For example, pages 6, 7, 8, and 10 in the screenshot below have lower time on page than the average (4 min 14 sec).
- Step 3 – Create time delay popups on these pages and keep the delays less than the average time spent on these pages. This will ensure that website visitors are able to see the popups before they leave these pages.
Go back to the Table of Contents
3. Display Offers Based on Where Users Come from
In order to get the most conversions from your popups, you need to make sure that your pop up offers are relevant to the needs of your visitors. You need to offer something that they will find valuable enough to take an action. This means that you can’t afford to adopt a one-size-fits-all approach here or else your visitors won’t care.

For example, existing subscribers of your blog are likely to get really annoyed if they encounter a popup that asks them to subscribe to your blog every time they attempt to leave your website.
So, you need to display relevant offers by targeting your website visitors appropriately. In Hello Bar, you can target who sees your offers based on parameters such as location, date, URL path, and many others as shown below.
Go back to the Table of Contents
4. Install Popups Where You Lose Users
Another great way to generate more leads from your website is to find out where most of your website visitors drop-off and install popups with relevant offers on these particular pages. To do this:
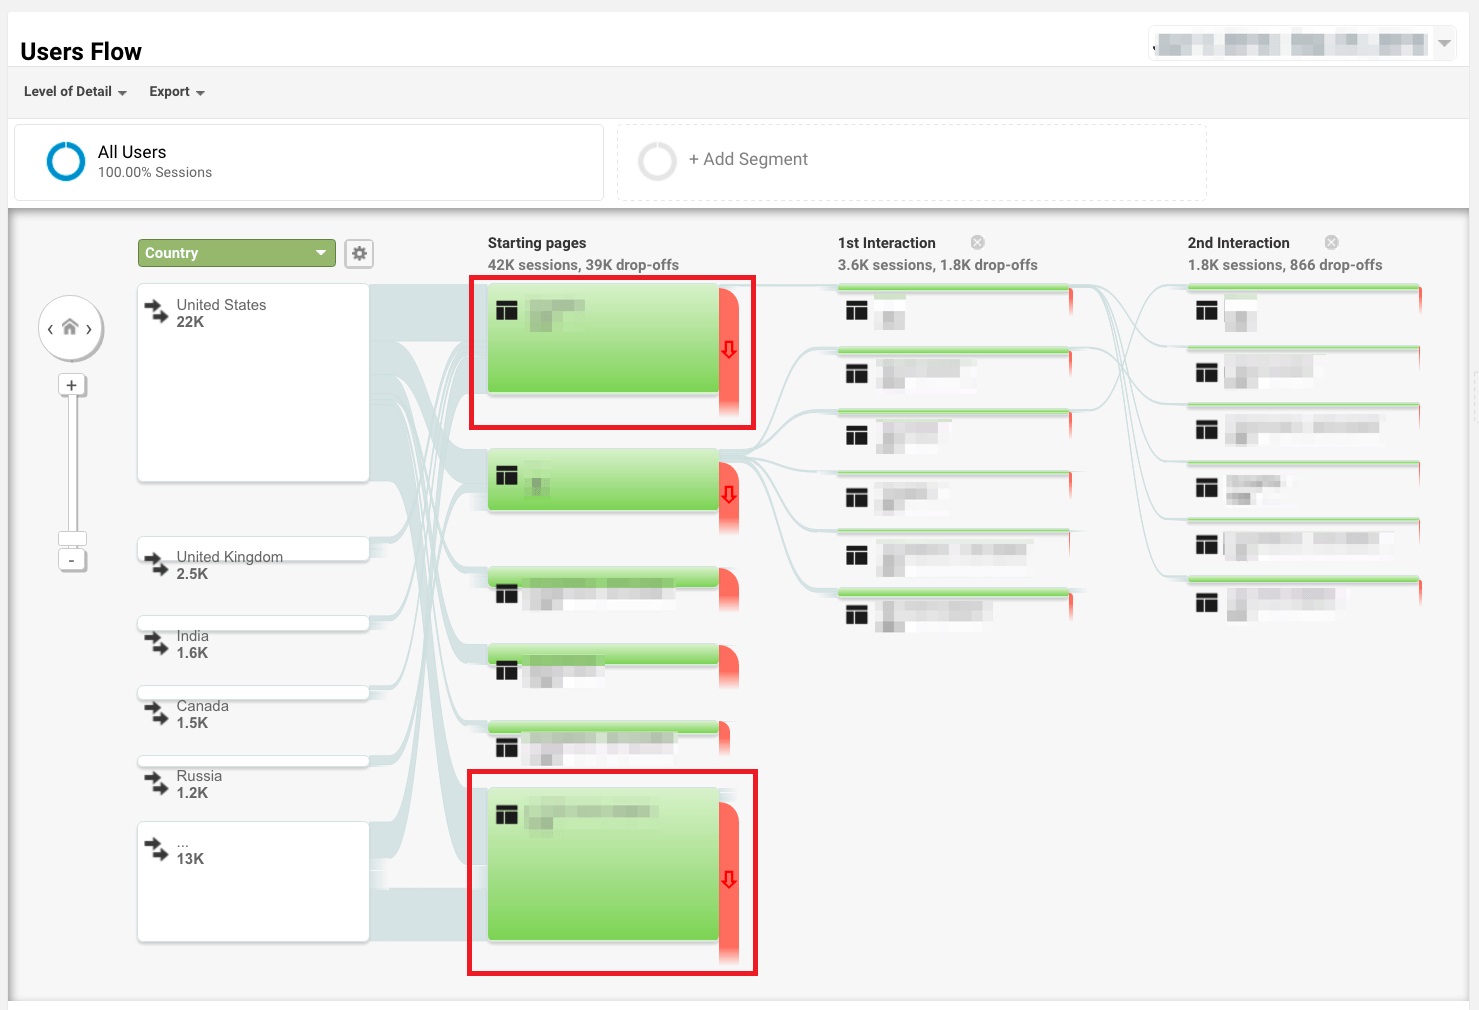
- Step 1 – Analyze your User Flow report in Google Analytics > Behavior > Behavior Flow
- Step 2 – Identify the pages that experience the maximum drop-offs (for example, the ones highlighted in red in the screenshot below).
- Step 3A – Install relevant popups on these pages to capture more leads.
You can accomplish this quite easily using the Hello Bar tool:
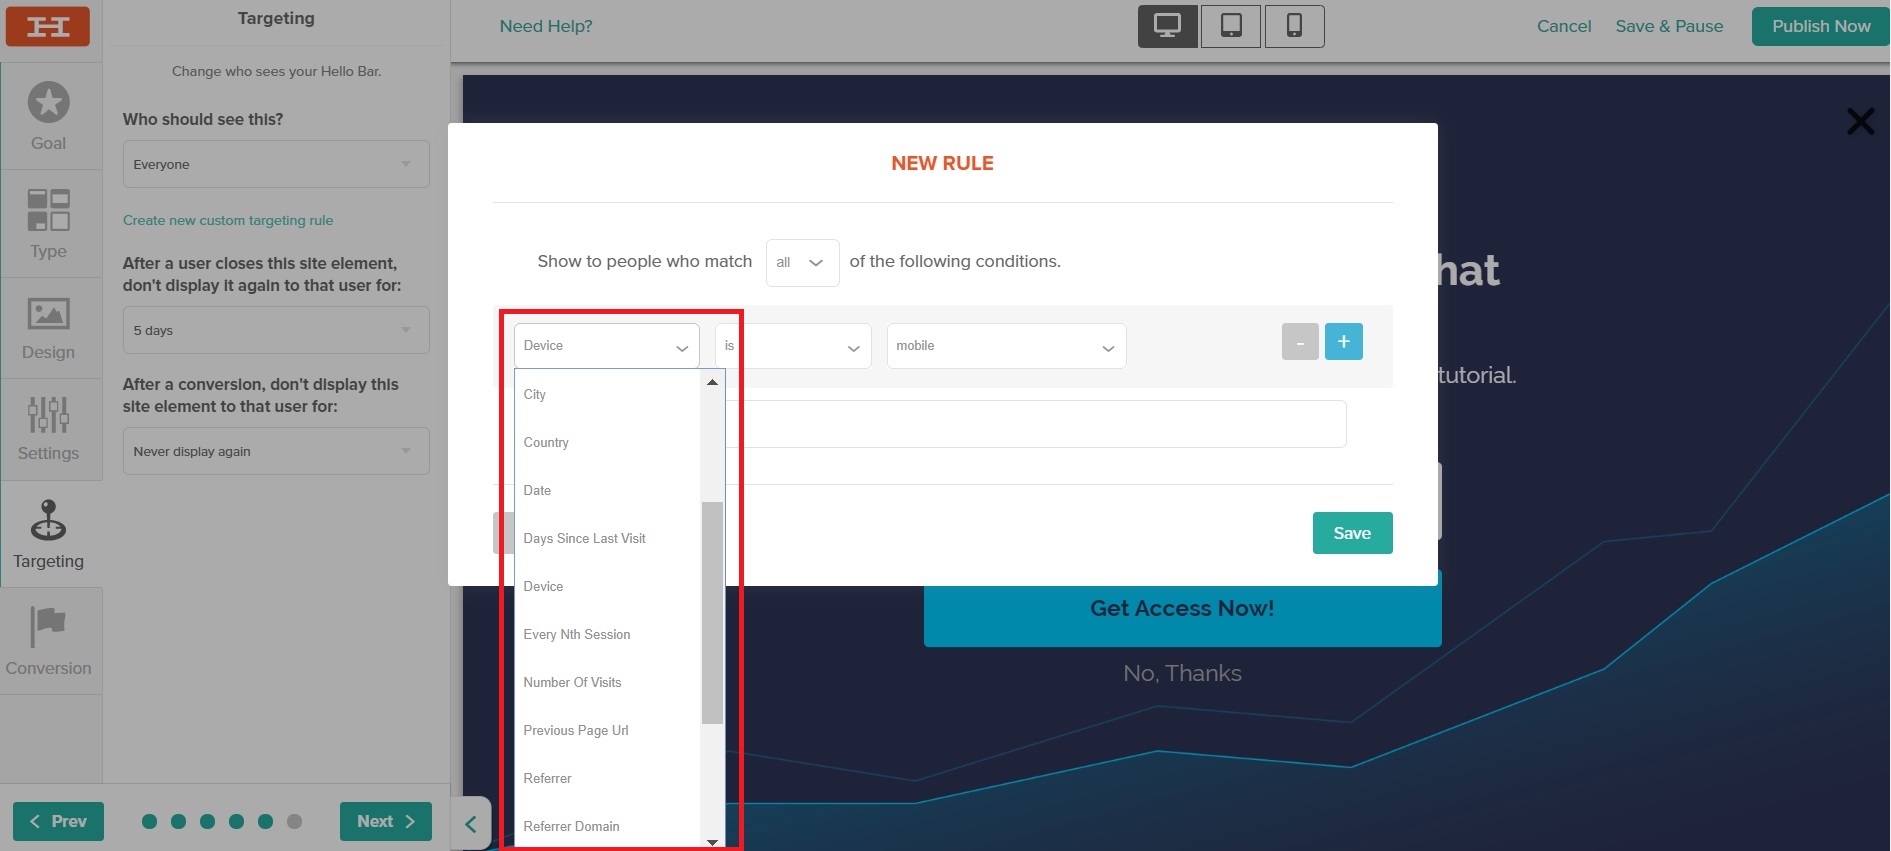
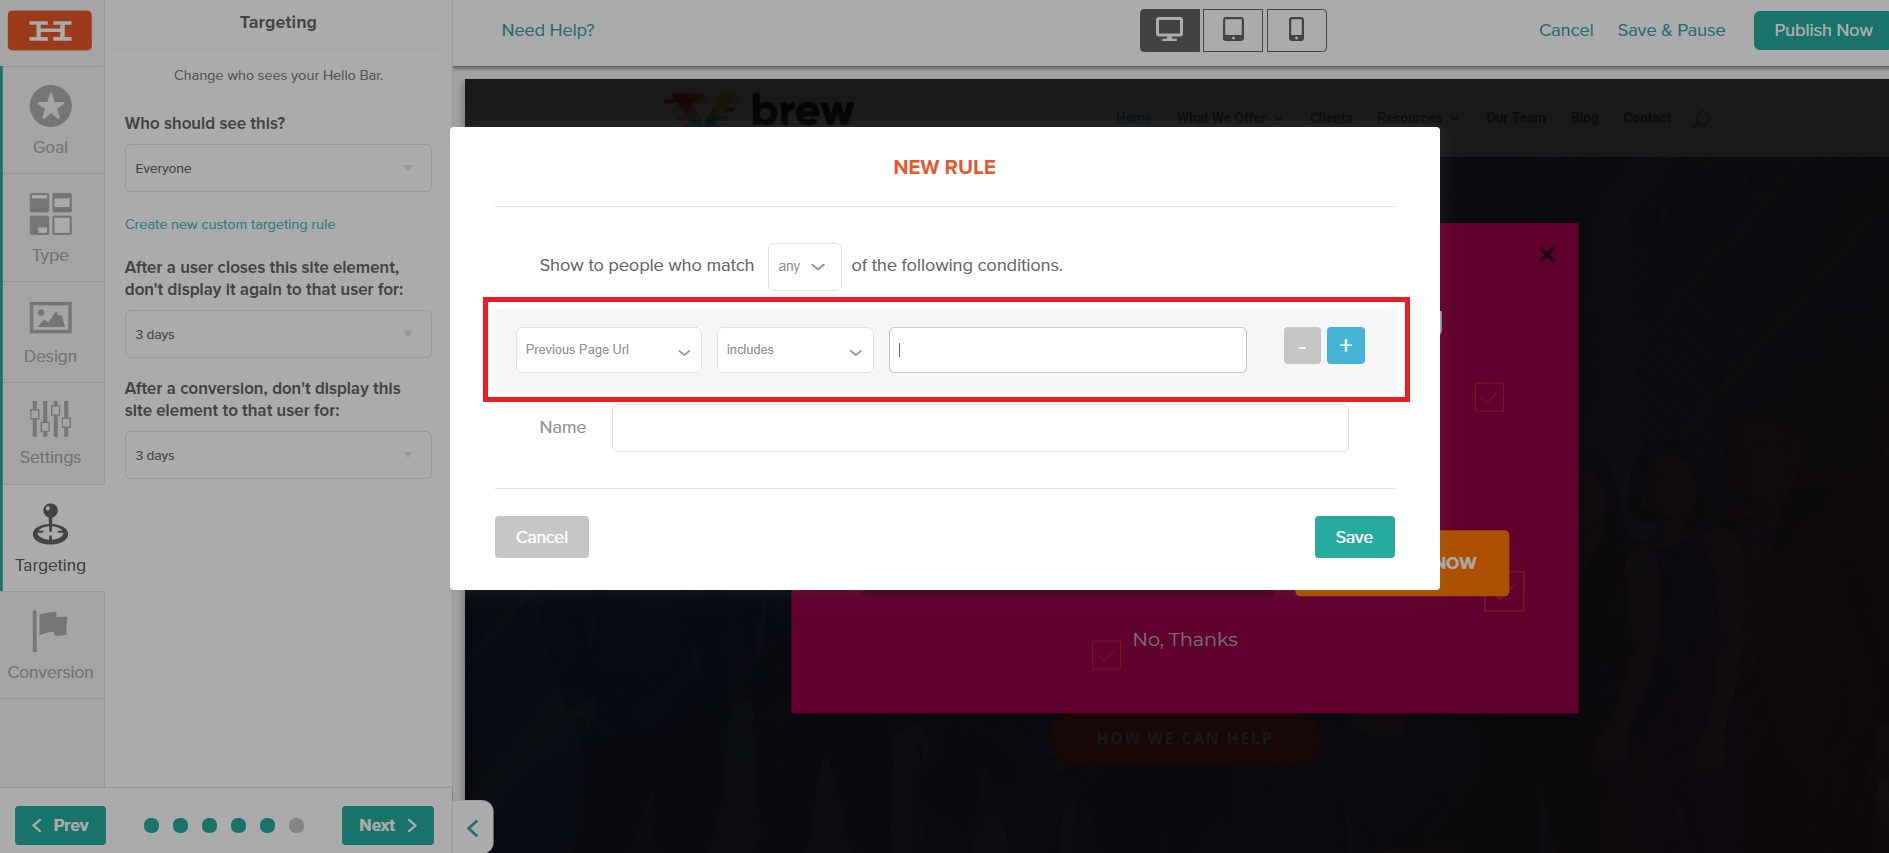
- Step 3B – Go to the Targeting section and create a new rule as shown below.
- Step 3C – Select Previous Page Url from the dropdown and mention the URLs of the pages that experience the maximum drop-offs.
Go back to the Table of Contents
5. Display Popups Based on User Interests
The only way you can increase conversions using popups on your website is to make sure that your offers are extremely relevant to the needs of your visitors.
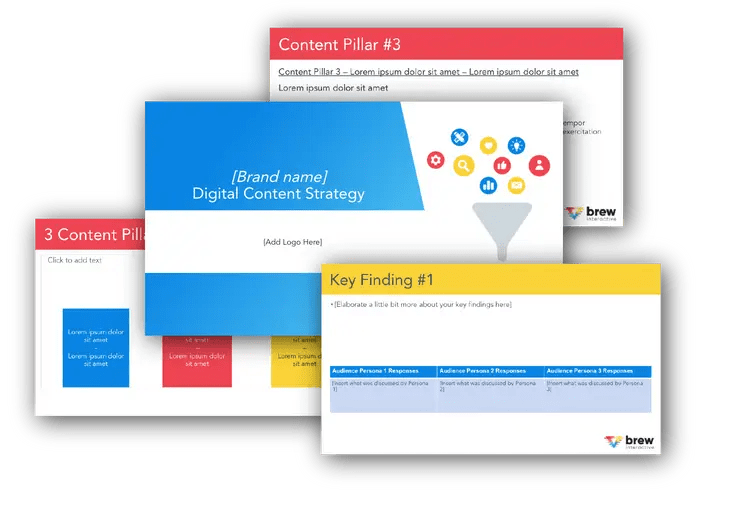
Free B2B Content Strategy Template
Not sure where to start when it comes to your content strategy? Struggling to gain traction? Grab our free B2B content strategy template to help you document your strategy.
One great way of ensuring this is to tailor the content on your popup based on the content of the particular page where it shows up. This makes sure that your offer matches the interests of users who have landed upon that particular page.

Users who browse this web page are likely to have an interest in pool grates. So, displaying an offer focused on pool grates is likely to result in higher conversions than displaying a generic popup on this page.
Go back to the Table of Contents
6. Use Popups on Pages with High Exit Rates and Bounce Rates
Webmasters lose a lot of important traffic on pages that have really high exit rates and bounce rates. The exit rate of a page represents the percentage of users who visited some pages and then left your website from that page. The bounce rate of a page represents the percentage of users who landed on that page and then left your website without visiting any other pages.
You can install popups on pages with high exit rates and bounce rates as these have proved to be quite effective at re-engaging lost visitors. Here’s how:
- Step 1 – Go to Google Analytics > Behavior > Site Content > All Pages
- Step 2 – Identify the pages whose exit and bounce rates are higher than the average exit and bounce rates.
- Step 3 – Install popups on those pages.
Go back to the Table of Contents
7. Use Interactive Quizzes
Interactive content such as quizzes are not only an excellent form of content to help you increase engagement but also a great lead generation strategy. 81% of respondents in a survey by CMI reported that interactive content is greatly effective at grabbing people’s attention.
So, how do you set up interactive quizzes on your website? Just use a tool such as Survey Anyplace. It allows you to deliver a highly personalized quiz experience and helps your visitors learn something interesting.
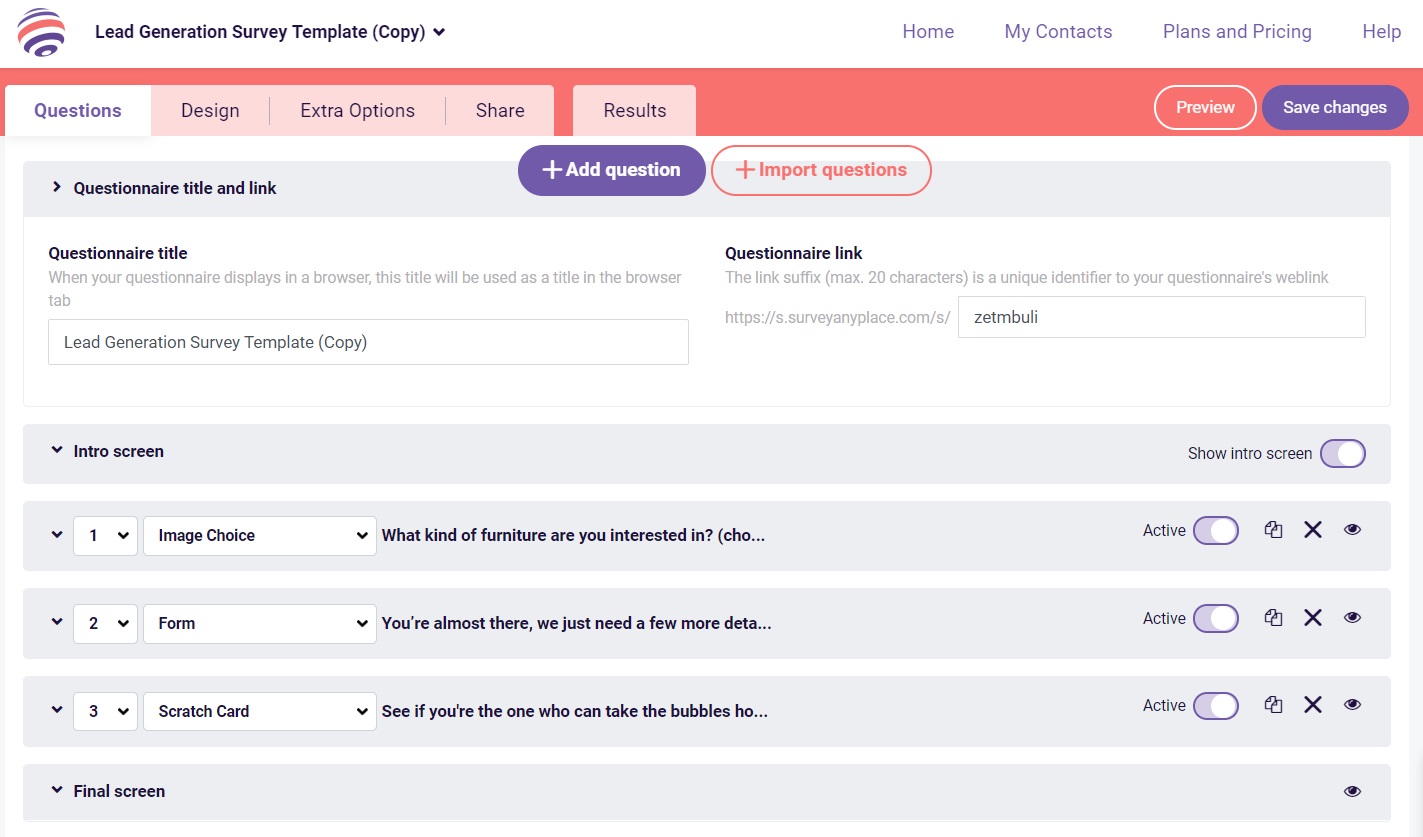
As an added bonus, you can help them download a personalized report right at the end of the quiz. This gives them a compelling reason to share their email address with you.
Go back to the Table of Contents
8. Reverse IP mapping
An IP (Internet Protocol) address is a unique number assigned to every device connected on the computer network.
Reverse IP mapping refers to tracking the IP addresses of people who visit your website. It lets you identify key anonymous prospects and get an insight into their website behavior such as time spent on pages, number of new sessions, bounce rates, etc.
The biggest reason why B2B marketers like you should do reverse IP mapping is to obtain data which can be used to gain insights on the relevant industries/people visiting your website.
Having access to this invaluable knowledge lets you create content, tailor-made to suit their needs which leads to increase in lead generation and conversions.
Apart from that, you can also keep a track of specific accounts you want to acquire and check which parts of your website they exactly look at. This gives you a deeper understanding of their requirements, enabling you to provide them with a personalized experience.
For example, let’s say, you’re part of an HR software company and are targeting recruiters. Through reverse IP mapping, you discover one of your dream accounts has been visiting pages on your website such as ‘free demo’ and ‘pricing’.
Now that you have access to their domain name, you know what kind of company they are and can send them an email elaborating on your services, customized to suit their needs and pain points.
Here’s how you can set up reverse IP mapping using Google Analytics.
1. On the Google Analytics dashboard, click ‘Customization’ and then ‘+ New Custom Report’
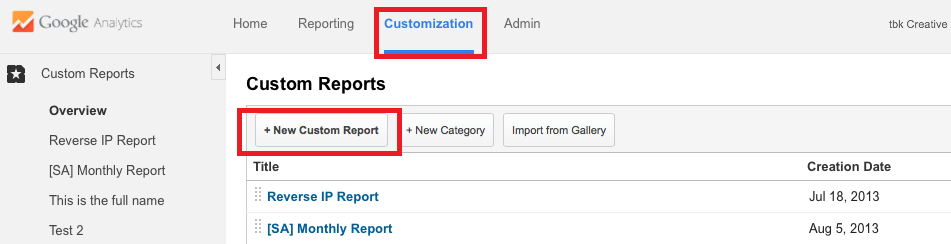
2. Assign a name for the custom report you’re about to create
-8.png)
3. Select how you want the data to be displayed. Let’s go with ‘Explorer’ for this example
-8.png)
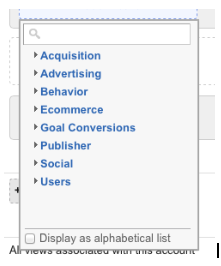
4. Under ‘Metric Groups’, select the type of data you want access to
5. Under ‘Dimension Drilldowns’, click ‘+add dimension’ and select ‘Service Provider’
-8.png) 6. Under ‘Filters’, you can filter out data you want to exclude/include. For instance, if you want to keep certain countries out, here’s where you can filter them out
6. Under ‘Filters’, you can filter out data you want to exclude/include. For instance, if you want to keep certain countries out, here’s where you can filter them out
7. Click ‘ Save’ once done and view the reverse IP report
-5.png)
This report gives you your website visitor’s service provider data.
How does this help?
Many large companies have their own (branded) IP address which means you can quickly identify the names of the companies just by looking at this data.
Once you identify prospects, understand which pages on your website were they particularly looking at. After that, you can go on LinkedIn or their website and find the owner or the appropriate point of contact (eg. the Chief Tech Officer of the recruitment company, in this example).
This will give you a headstart in reaching out to them with a personalized offer through email or you can also get your sales representatives to give them a call.
Go back to the Table of Contents
9. Use HubSpot’s Prospecting Tool
Even though you need a HubSpot subscription to access this tool, it’s worth a mention purely because of the ease with which it lets you identify engaged prospects, gain deep insights on their behavior and spend quality time on the ‘warmest’ leads who are most likely to close.
This tool uses the HubSpot tracking code to identify every visitors’ IP address for all pages on your website.
Here’s how you can use HubSpot’s Prospecting tool.
1. On your HubSpot dashboard, navigate to Reports > Analytical Tools
-4.png)
2. Click ‘Prospects’ (at the bottom of the page)
-3.png)
3. You get company and domain names of prospects who have visited your website
-2.png)
4. Click on the individual company names to understand the traffic source. In the below example, we can see that Neutra Network Services came from an article posted on Social Media Examiner
-2.png)
5. Click ‘View on LinkedIn’ and you will be directed to their company page. Browse their list of employees and try and find the appropriate point of contact
-2.png)
Go back to the Table of Contents
10. Use LinkedIn Website Demographics
Another way to get insights into visitors who don’t convert is through LinkedIn Website Demographic. This free tool lets you understand your website visitors better and customize content accordingly to appeal to your prospects.
All you need to do is add the LinkedIn Insight tag on your website which serves as a tracking tool and provides you information about your website visitors.
Being a B2B player, we’re assuming you use LinkedIn to generate leads and have an ads account. So, let’s move on to how you can install the Insight tag on your website.
1. Sign in to Campaign Manager and under ‘Account Assets’, click ‘Insight Tag’
-2.png)
2. You will then get three options to install the tag. Let’s go with ‘I will install the tag myself’ for the sake of this example
-2.png) 3. You will immediately receive the tag which needs to be inserted in your website’s footer to track conversions which includes information of visitors who visit your website while being signed into LinkedIn
3. You will immediately receive the tag which needs to be inserted in your website’s footer to track conversions which includes information of visitors who visit your website while being signed into LinkedIn
-3.png) 4. 24 hours after installing the tag code, you can start viewing the demographics data by clicking ‘Website Demographics’ on the Campaign Manager dashboard
4. 24 hours after installing the tag code, you can start viewing the demographics data by clicking ‘Website Demographics’ on the Campaign Manager dashboard
-2.png)
5. You can view the data by the following category filters. Company is one of the most important categories as it lets you understand exactly the kind of people visiting your website
-2.png)
This data can be used to customize your website or blog content, identify shared customer traits, strengthen buyer personas and optimize your LinkedIn ad campaigns.
Go back to the Table of Contents
11. Track Visitors’ Geolocation
What if a large section of your website traffic comes from a particular country that you’re not even factoring for while creating website content? Now, that’s a huge missed opportunity.
Tracking your visitors’ geolocation lets you understand which part of the globe your visitors are from to evaluate potential and gaps in your content.
You can use Google Analytics to derive this data by clicking on ‘Geo-location’ under the Audience tab.
-1.png)
Go back to the Table of Contents
What Can You Do with the Data?
Now, that you have this data, it’s time to leverage it and boost conversions.
-3.gif)
Here are three essentials ways you or your lead generation agency can put it into good use.
1. Uncover New Accounts and Offer a Personalized Experience
Every company has a list of dream accounts they want to acquire but haven’t been able to.
Reverse IP mapping helps you achieve that as it gives you intel on visitors’ intent and behavior This is a valuable piece of information as it enables you to target prospects with personalized communication.
For example, if the prospect belongs to the IT industry, you can present them with a case study relevant to their industry to demonstrate your expertise and build trust.
The idea is to use behavioural data to gain insights about the anonymous visitor and create content that would move them through the sales funnel.
Go back to the Table of Contents
2. Re-engage with Ghosting Prospects
Do you know what’s worse than anonymous visitors? Being ghosted by promising leads.
%20(1)-1.gif)
Ghosting is you’re communicating with a potential prospect and you think it’s going great until they suddenly disappear leaving you wondering what just happened.
From poor timing and evaluating your competitors to not finding what they’re looking for – there can be many reasons why you may get ghosted.
Don’t drop the ball just yet.
With HubSpot, you can also choose to get notified every time a lead visits your website. That way, you can send timely follow-ups and engage with the lead.
On your HubSpot dashboard, navigate to Settings > Notifications. Choose ‘All Leads’ under Website visits.
-1.png)
Apart from sending follow-up emails, you can also re-engage with them on different platforms such as running a remarketing campaign or adding value in your follow-up emails by sharing an eBook or case study that would make them consider you again basis the data you have in hand.
Go back to the Table of Contents
3. Improve Lead Nurturing
By tracking website behavior, you can be more proactive when it comes to lead nurturing and provide answers to prospects even before they’re asked.
For instance, if you notice a lot of visitors from the same company (which happens to be a potential account) viewing the ‘pricing’ page or your product/service pages, it shows they’re actively evaluating your company.
So, instead of waiting for them to write to you, you can reach out to them and ask them if they wish to speak to a sales representative to know more.
Go back to the Table of Contents
Final Thoughts
Lead generation is one of the most crucial marketing activities that’s necessary to keep your business up and running. So, follow these 11 simple strategies to generate quality leads from your website and see your conversions skyrocket.
Can you think of any other interesting ways to generate leads from your website? Let us know in the comments below.
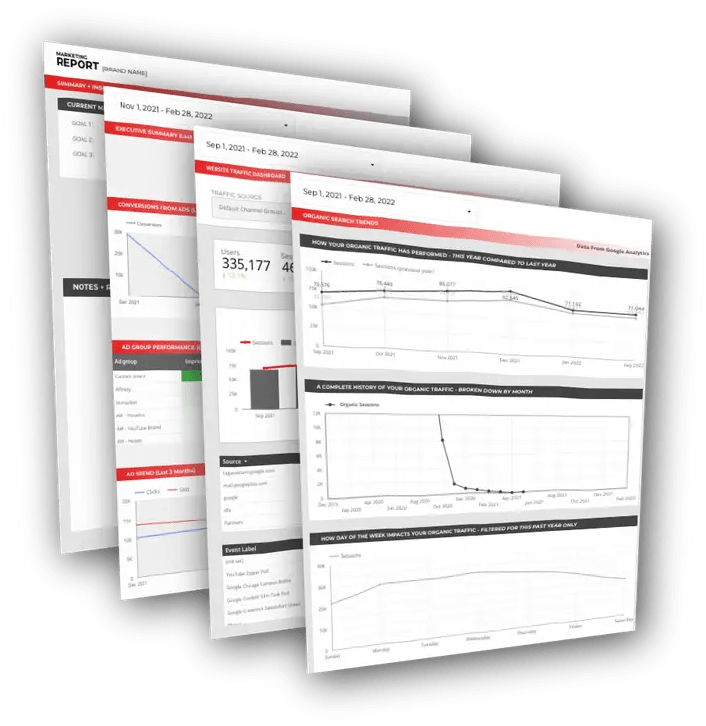
Free DataStudio Marketing Report
Improve your marketing reporting with our free DataStudio template that pulls data from Analytics, Google Ads, and Search Console to get a 360 degree view of your digital performance.
Marcus Ho is the founder and Managing Director of Brew Interactive, an award‑winning B2B digital‑marketing agency that helps organisations transform their sales and marketing processes in the Asia‑Pacific region. With a career spanning over a decade in digital, he has led strategies for global brands such as Hitachi, Bosch, and 3M, focusing on data‑driven campaigns and go‑to‑market acceleration.
